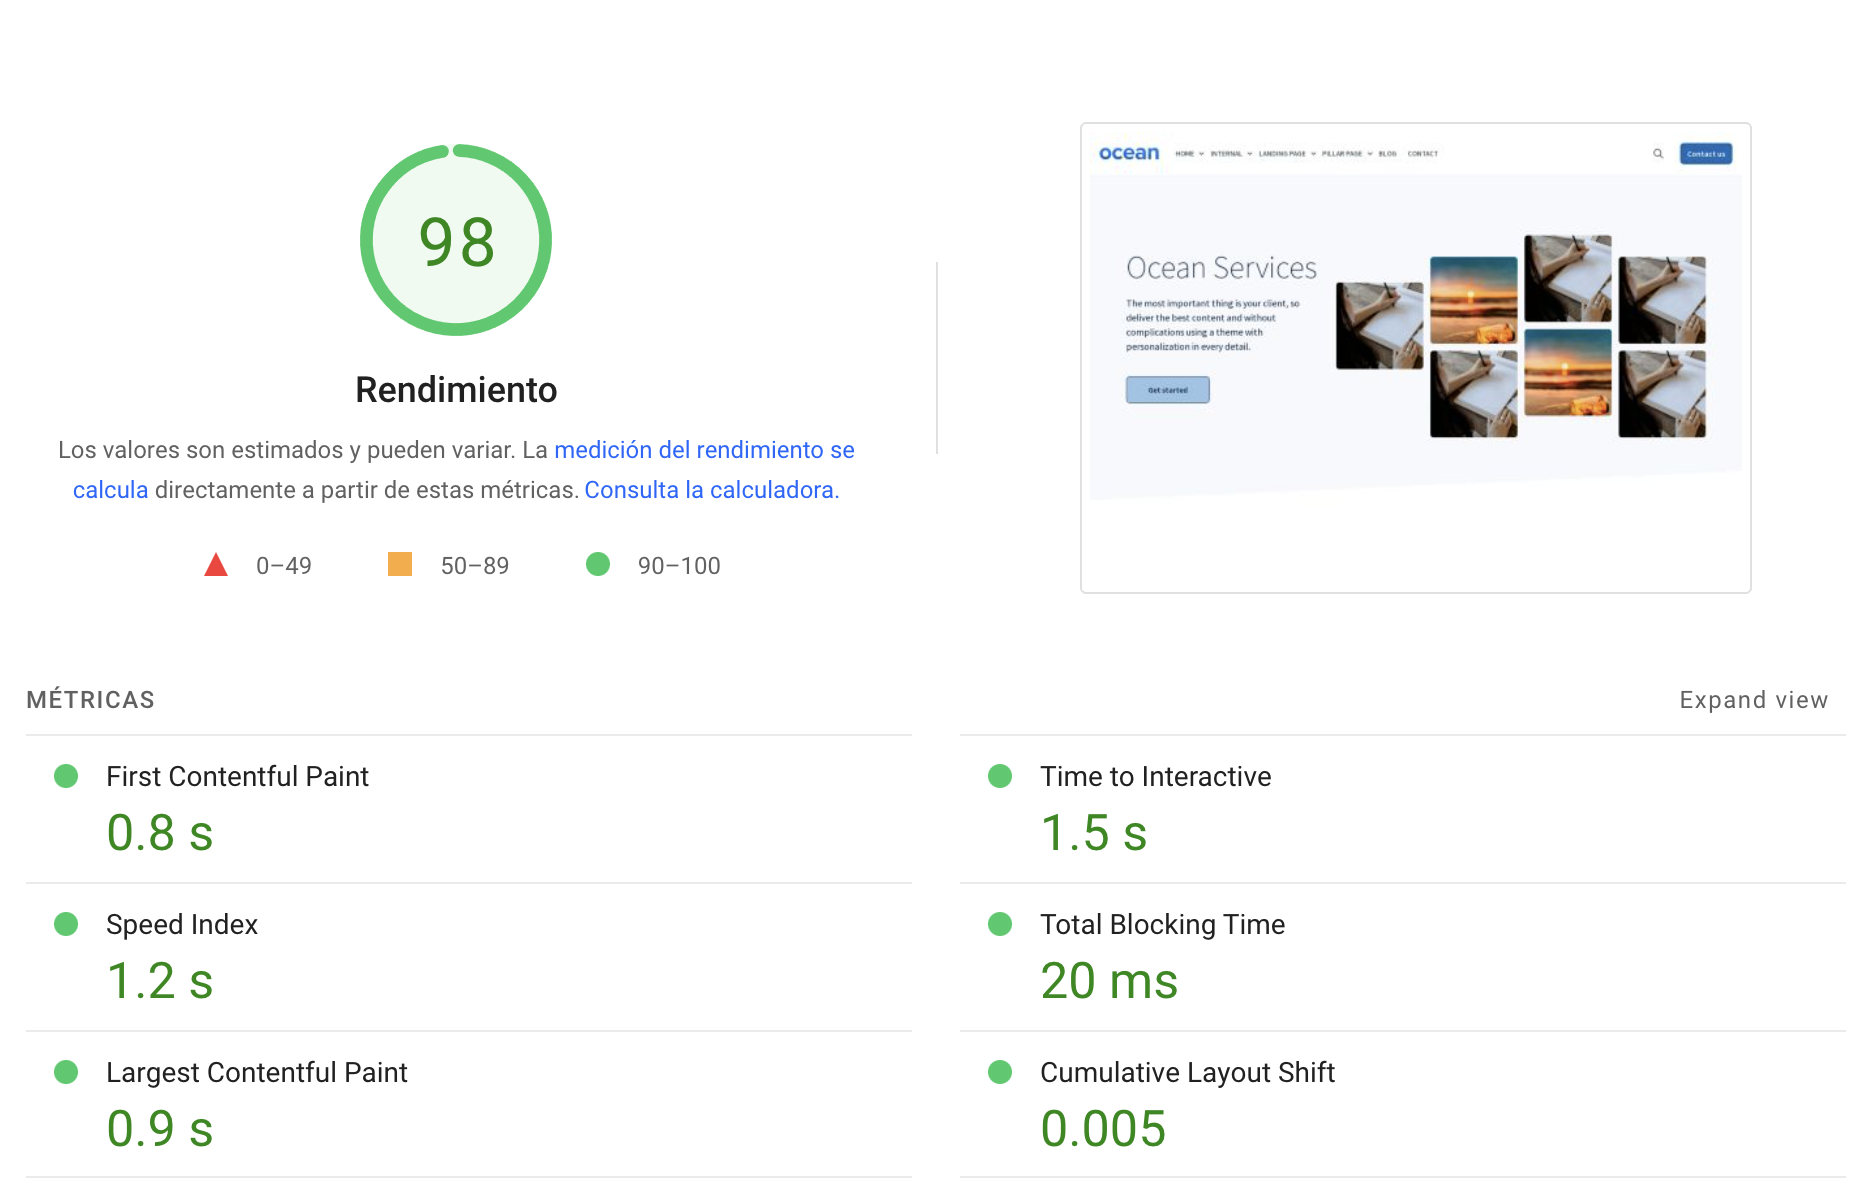
Skip to content

    Redesign your site in an agile way and close more clients.

    Create or re-design your website in the HubSpot CMS in an agile way using the Themes created by Media Source.

    Table of contents

    Introduction

    Congratulations on taking the first step in creating a website that will help your business grow. In this guide you will find the steps and actions necessary to achieve a powerful website

    To get started you will only need the following:

    • A HubSpot account and the CMS, either the Free, Starter or higher version.
    • In case you already have HubSpot, you require access to the marketplace and permissions for the Website options.
    • Download one of the free web themes that we have created at Media Source or the paid themes: Ocean Pro or Functional Pro.
    • A cup of coffee or tea, your favorite playlist and that's it.

    We divide this guide into 4 important sections.

    • Section 1: Preparation of your new website
    • Section 2: Reconstruction or creation of your website
    • Section 3: Launch 
    • Section 4: Improvements and growth

    Let's start with the first section.

    Section 1

    Preparation of your new website

    In order to achieve a functional and powerful website, some actions need to be carried out, in order to guarantee that the final product is what you are looking for and really drives the results of your company.

    To do so, you have to perform these steps:

    • Audit of your current website
    • Theme Settings
    • Setting up your brand
    • Header and footer settings

    1. Audit of your current website

    -List of web pages, blog posts and landing pages

    The first step is to prevent your web redesign project from turning into chaos.

    To do this, you must take an inventory of all the pages of your website.

    Use a spreadsheet where you have a table for web pages, landing pages, and blog posts.

    This is what the structure of the web pages would look like:

    Tabla_1

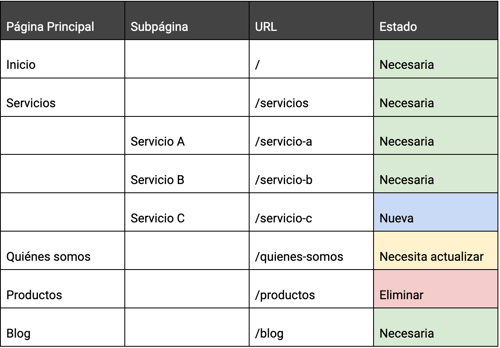
    For blog posts, in addition to web columns, add a note if necessary.

    For the landing pages, you can add, in addition to the columns that the web pages already have, an objective column to identify the use that is given to it and, based on that, decide whether to improve or eliminate it.

    -Creation of the new sitemap

    Now that you have the inventory, duplicate the previous document and name it "new sitemap".

    The first step is to delete all the rows that have a “Delete” status.

    Once this is done, if necessary, add rows for new pages as the case may be: main or subpages.

    Next, add the following columns, followed by Status, to work on your new sitemap.

    Progress: you will have the following options: Ready,  In progress, In review and  paused.

    Page content: here you refer to the document that contains the information of the section.

    This column will help to know how the content of the page is going.

    Note: In case something needs to be considered, it will be noted in this column.

    Both in this step and in the first one, I recommend that you use Google Drive or Microsoft One with their respective versions for Spreadsheets and Documents. This will make a single version exist and everyone can collaborate.

    -Review and optimize the content of each page

    For your website to be useful and contribute to generating sales opportunities, you must focus all the content on your potential clients, being clear and reliable. Mainly, avoid confusing them or worse, talking more about yourself than what you do for them.

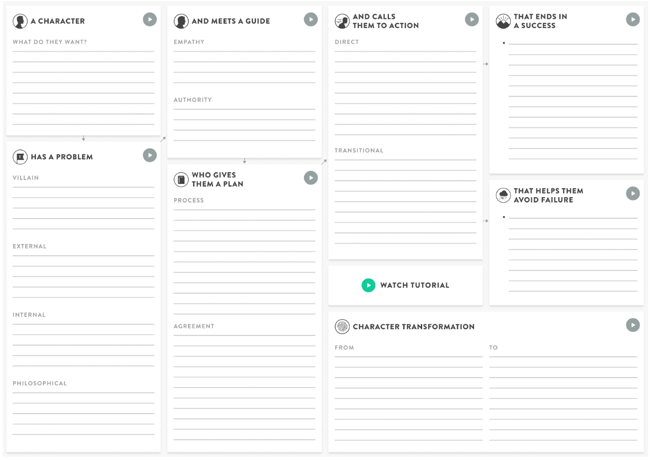
    There are several methodologies or frameworks that you can use for content structuring. At Media Source we are certified in StoryBrand, that's why it's the one we usually use. The key points are the following:

    First, your customer is the protagonist so, again, your site should speak more to him than about your company.

    This is the frame of Story Brand that you can create by reading the book or with the course available online.

    Tabla_2

    You can see an example of how it is applied on our website.

    In case you want us to help you, schedule a meeting with one of our consultants.


    2.Theme Settings

    Ocean Pro themes require CMS Pro version or higher or Marketing Pro version or higher.

    3.Setting up your brand

    The themes we have created inherit the default settings that your HubSpot account has. To place the values go to this link: Brand settings.

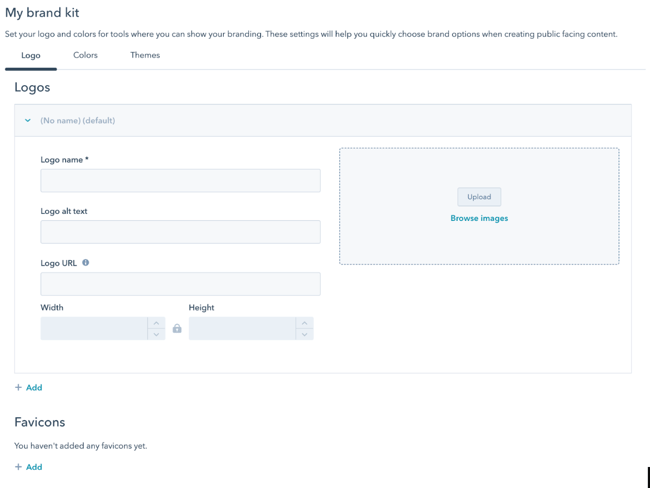
    Access the main option: Brand kit.

    In the first “Logo” tab, fill in the fields and upload your logo; preferably in SVG. The Favicon is the one that is shown in the browser next to the name of the page; must be square and PNG.

    Tabla_5

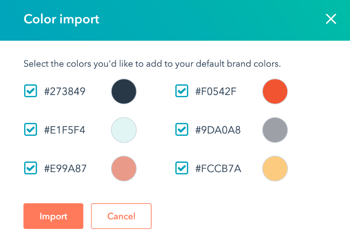
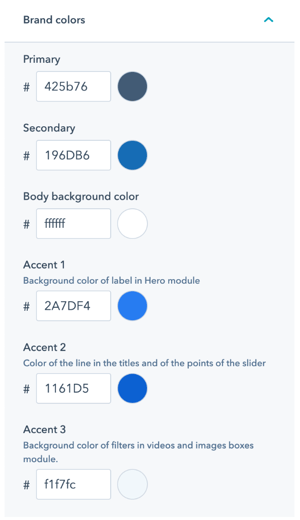
    In the colors tab, add your brand colors:

    Tabla_6

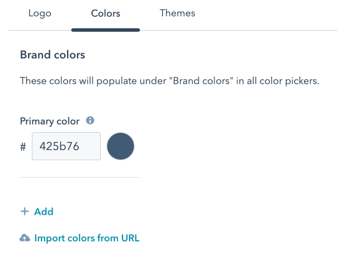
    You can use the option to import the colors from your current site.

    Tabla_7

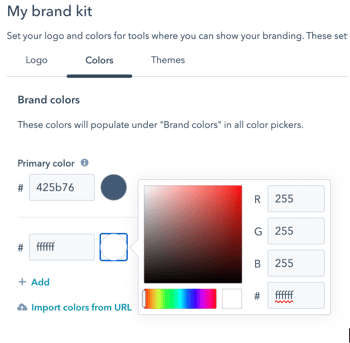
    Or you can add them manually. The main color, in most cases, is black or a dark color.

    Tabla_8

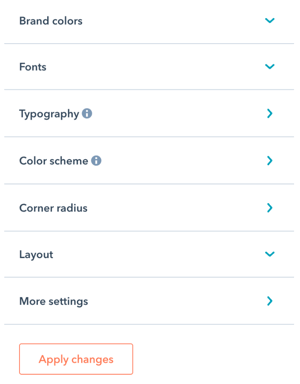
    Now you must customize the available options of the theme, accessing from the Themes tab:

    Tabla_9

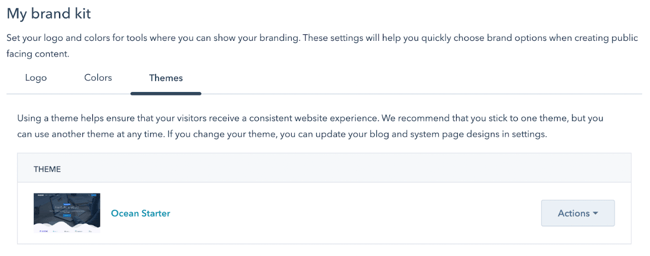
    In case the theme you downloaded is not displayed, click "Actions" and "Change Theme" to choose the theme you want to use.

    To start the configuration, click on the theme name to open the available options.

    Tabla_10

    Brand colors will take the colors previously configured in the brand kit. If you review the previous templates and you are not convinced, you can change them:

    Tabla_11

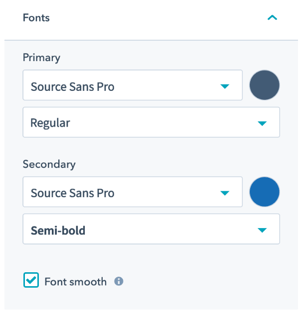
    Regarding web fonts, you should choose 2; one for the titles and one for the rest of the elements. Sources must be from Google Fonts; Only in the case of the Pro versions can you request a custom font at no cost.

    For a custom font it is important to have created the child theme.

    Tabla_12

    There are several options available that you can configure:

    • Rounded edge (Corner radius)
    • Page width
    • The space between sections
    • The 3 types of buttons included
    • The styles of the forms
    • Icons
    • Boards
    • The options available for the header and footer

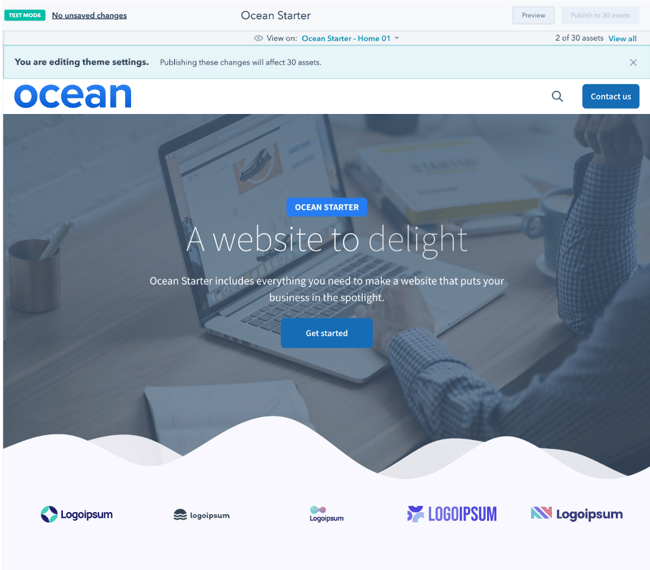
    To see the settings you can change the page on the right side and adjust any of these styles later.

    Tabla_13


    4.Header and footer settings

    Now it's time for the header and footer. Both elements are global, which means that they are displayed on all pages and you only have to edit them once.

    In the case of the header, they all require the logo. Since you have already set it up from the brand kit, you will not need to edit it. In case you want to place a variant, you can do it from the global header.

    Another element is the navigation menu. In the header, the menu that should be displayed on all pages is selected and created in Navegación.

    In this section you can create various menus and add the pages. Since you do not have the pages yet, for now you will  just create the two menus: one for the header and one for the footer. If you do not  want a footer menu, just create one.

    This, in order to select it both in the header and in the footer.

    Some themes include a button that you can configure for the Contact page, Schedule an appointment, or some other important option. In case you do not want that button, you can hide it.

    In the footer of the page you can choose to change the logo for another variation, add a different menu to the one in the header, place the links of your social profiles, the links to the terms and conditions, in addition to the privacy policy.

    If you prefer, you can add more blocks in the footer and readjust the number of columns or rows to your choice.

    So far you already have the necessary configuration to start rebuilding your site.

    Section 2

    Reconstruction or creation of your website

    You now have everything you need to start your site. Now let's see how to start rebuilding it in an agile and, above all, functional way.

    If your site is already in HubSpot and you're doing a redesign, you can skip to step 3.

    • Import your current website structure into HubSpot
    • Import your blog
    • Organize your assets
    • Create your pages
    • Review, edit and approve

    1.Import your current website structure into HubSpot

    To have order we are going to import the structure of your website and according to the document you made in section 1, you are going to import the structure of the pages that must be preserved.

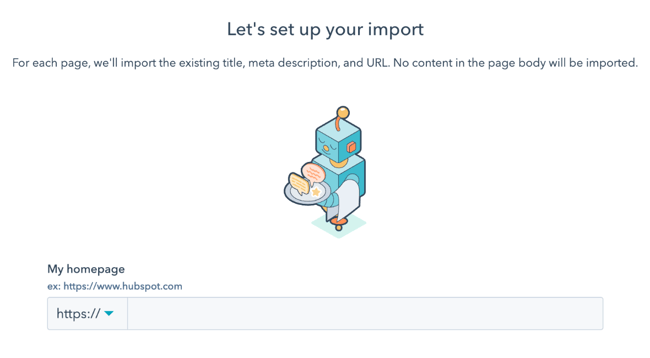
    Note: The import of the structure does not bring the content, it only imports the url, as long as the page title and meta description exist.

    To start with the import of the structure, go to Content Import.

    Under Content Import, start a new import of the web pages.

    Tabla_16

    Put the domain of your website and make sure it matches http or https, according to your domain. Most are https://, but to be sure, you can check by opening your site in the browser.

    Tabla_17

    Click continue and you should wait a few minutes according to the size of your website.

    Tabla_18

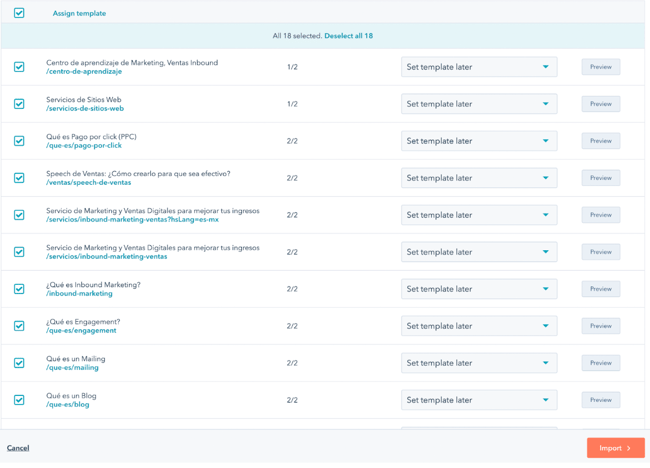
    As soon as the status changes to ready to import, based on the audit you did in Section 1, choose which pages to import.

    Tabla_19

    Before importing you can choose which template to assign to it. If you still do not know the templates of the chosen theme, you can see them in the preview of each one. Similarly, you can skip choosing the template.

    Tabla_20

    When you finish choosing which pages to migrate, click continue and choose the domain. In case it is CMS Hub Professional, you can add several subdomains and choose the one to which the import belongs.

    Tabla_21

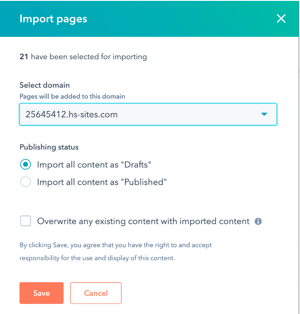
    If it is just a domain, select it and that's it.

    It is recommended that you import the draft pages; the override box will remove pages you have created that have the same url, so if you started by creating pages, do not check the box.


    2. Import your blog

    Now let's perform the import of the blog. In case you do not have a blog, it is important that you know that you are missing out on many business opportunities, since one of the many benefits of a blog is that it attracts potential customers from search results.

    Depending on the CMS version, you can create one blog or more than one. We are going to start with the import of your blog, in the same section of Content Import.

    Create a new import, but now choose Import Blog post.

    Tabla_22

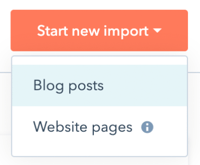
    In this case, the blog import does include the content. You can use the smart copy option to let the HubSpot bot work its magic.

    Tabla_23

    Complete the marked fields, starting with the url of the main page of the blog. This is usually where the list of all posts is located, followed by the url of the most recent blog post.

    Tabla_24

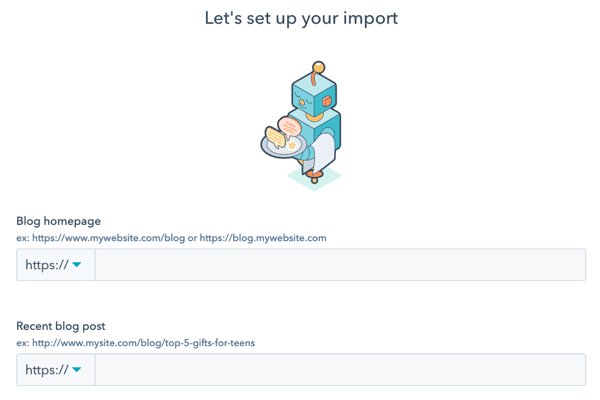
    Then, in the list that they show you, choose the platform you are currently using. If you do not know it, you can choose I am not sure.

    Tabla_25

    Now create a new blog in your HubSpot account.

    Tabla_26

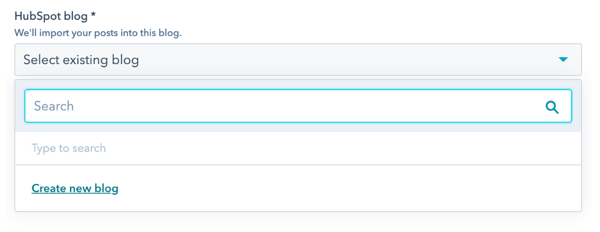
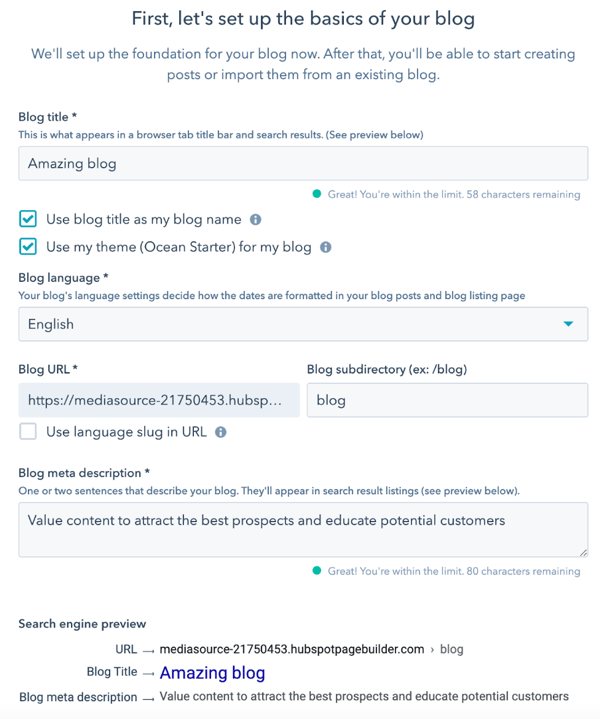
    Then complete the required fields.

    At this point, since you have chosen a Theme in your brand kit, it will be used for the blog, so there is no need to configure anything other than filling in the fields.

    Tabla_27

    Once you create the blog and all the import fields are complete, click Start. After that, you have to wait a couple of minutes.

    Tabla_28

    When the import is ready to review:

    Tabla_29

    You must map the fields to align them with the ones you need in HubSpot:

    Tabla_30

    Depending on where your blog is currently, some fields will appear. Choose the ones that apply and complete the import.

    Up to here we already have the structure of the pages and the imported blog, so now let's go to the next point of preparation.


    3.Organize your assets

    To keep everything in order and make it easier for you and your team to create the pages, upload all the necessary assets such as:

    • Logos
    • Icons
    • Graphics
    • Photos
    • Videos
    • PDFs
    • Equipment

    HubSpot has a File Manager where you can create folders and upload the aforementioned file types.

    For this step, go to File Manager and create the folders according to what you have and within each one, upload all the corresponding files.

    Once the folder is created, one of the advantages is that you can drag all the files to it so that they start uploading.

    In the case of files such as PDF, once uploaded, you can select them and change the visibility so that they do not show in the browser. This is very useful if it is a resource for which prospects need to fill out a form.

    4.Create your pages

    At this point it is very likely that the import of the structure of the pages is complete, so we are going to go to Websites.

    All the pages that were imported in terms of structure will appear here.

    To start completing them, you need to enter. In case you have not chosen a template during the import, when accessing any page you will be asked to choose a template.

    The number of templates available will depend on the theme you have installed. Choose the template that best suits the content of the page you are going to create.

    If no template has all the elements, don't worry, you can choose any template and within the page editor, remove, add and edit sections as required.

    All the themes we have created have sections you can use that help make creating a page much more streamlined.

    To access the sections of the topic you must click on Home and position yourself between one section and another to display the + circle.

    The number and modules within each section varies according to the downloaded theme.

    You can easily remove entire sections or change a section from one column to two columns or vice versa; just drag a new module and that is it.

    For better control, use the Content tab. This will allow you to access the styling options for sections, columns, and rows more easily.

    Tabla_35

    Likewise, you can create new sections with only a certain number of columns and then drag the necessary modules. To do this, do the same as choosing a section, but click on the Structures tab:

    Tabla_36

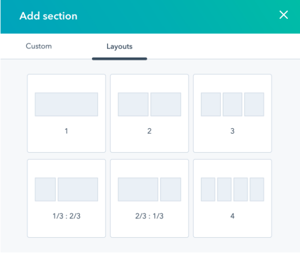
    It is one more way to create sections:

    Tabla_37

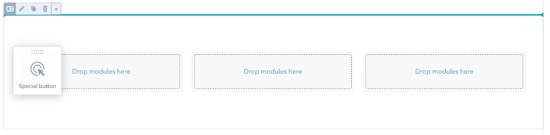
    Remember that you can always reorder the sections, columns and rows.

    Finally, each theme has a certain number of modules, which allow content to be displayed in various ways and arrangements, as well as styles. In some modules you can change the styles or some variation of the module.

    Another important point and feature of the themes we have created is the ability to edit the mobile version.

    In free themes, this helps you style sections and columns. In the case of Pro themes, certain modules have styles that apply to mobile devices.

    To access this feature, just click on the mobile icon.

    We hope you can create amazing pages that your potential customers will love with the themes we've made and the powerful HubSpot CMS editor.

    Remember to post the pages as you complete them.

    Let's move on to the next section.

    Section 3

    Launch and celebration

    We are one step away from seeing the light of your new website, so it is time for you to focus on tightening the last nuts so that it works as a perfect gear and you can have the fruits of so much effort more effectively.

    What do you have to do to achieve it? Just follow the steps and the valuable advice I give you.

    Afterwards, you can go celebrate with all your teams in peace, without forgetting that you must continue nurturing it to enhance and maintain the results.

    • Quality review
    • Configure third-party tools
    • Connect domain
    • Add redirects
    • Filter internal traffic

    1. Quality review

    In the quality review, fill in the menus that you left blank in Section 1. This will check that all pages are live and not draft.

    Then go to Navigation.

    Select the corresponding menu if you have more than one and add the pages it must contain one by one. If any page is in draft, it will show you a label, so you have to go back to the page and publish it.

    The next quality check, once the menu(s) have been completed and published, consists of viewing the site in both the desktop and mobile versions.

    You can make a document to write down all the details found and not interrupt the review. When you finish checking each page, edit any errors you find.

    2.Configure third-party tools

    While HubSpot's CMS shows you metrics of your site's performance, you may still want to use Google Analytics or another tool. To configure it on your new site, you must access the section of Integrations.

    Natively, HubSpot has the following options:

    • Google Analytics 3 (until 2023)
    • Google Analytics 4
    • Google Tag Manager
    • AdRoll 

    In integration you activate the box and place the corresponding ID.

    In case you need to add more codes, you can do it using a Google Tag Manager account and thus have more control.

    You can set up advertising tools by connecting your Facebook Ads and Google Ads accounts from Advertisement accounts.

    The CMS Free and Starter versions only allow you to connect 2 accounts, but if necessary you can add the pixel from Google Tag Manager.

    3. Connect domain

    To connect the domain you must complete the steps from Domains.

    You start the step by step by clicking Connect.

    Tabla_40

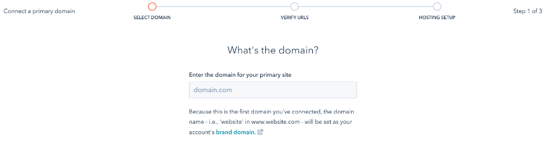
    Depending on the version of the CMS, you can choose a different subdomain for each type of content: Websites, Landing Pages and Blog.

    In some cases, depending on the provider, you can make the connection automatically only knowing permissions, but it depends on the provider of your domain.

    If not, you must make the changes to your domain manually. Here you have the  HubSpot guide  to do it. 

    When your domain is fully connected, HubSpot will add the SSL and your new site will be visible in HubSpot.


    4.Add redirects

    To find out if you need to perform this step, consult the Excel of the audit you carried out in Section 1.

    Redirects can only be configured in CMS Starter versions or higher.

    Redirects are set up in case a page has been removed or merged with another. This, to provide a better browsing experience to users who have previously visited the site or in case the link of the page that will no longer exist continues to be displayed in search engines.

    You can do the redirect from the section de  URL Redirection.

    Click on add new redirect and fill in the fields.

    Tabla_41

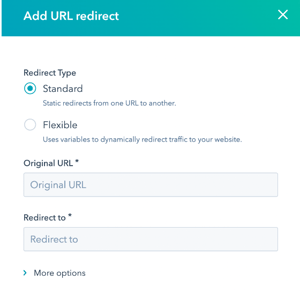
    The original URL is the one that will no longer exist and the redirect URL is where we want it to be sent. You can add them one by one or perform an import.

    5.Filter internal traffic

    Finally, it is important to filter the internal traffic of the company.

    To do so, it is first necessary to verify that the IP is fixed to add only one or add each of the IPs of the members of the company.

    Excluding internal traffic will allow you to have clearer and more realistic metrics.

    In case they do not have a fixed IP, you can ask the whole team to send the IP. There are several online tools that can provide this information.

    Once you have the IPs, add them in the section Progress tracking, in the Exclude Traffic section:

    Tabla_42

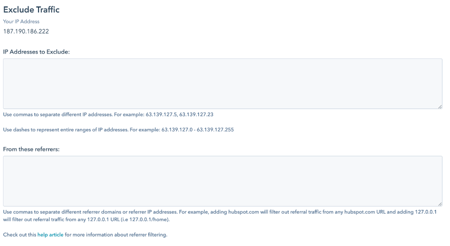
    If necessary, you can also block references that are commonly used for development testing. This in the second frame.

    You can update the IP listing as needed.

    Finally, save the changes and you are done.

    Now you can go celebrate! You have your new website. Just remember to come back, as the good is yet to happen.

    Now you have a website in a tool that will allow you to execute strategies in a more agile way.

    Section 4

    Improvements and growth

    With your site online and with the ability to measure, edit and create that you have, it is time to start equipping it with what is necessary to attract your potential customers.

    To do this, we recommend you take into account the following key actions:

    • Brainstorm the questions your potential customers are asking
    • Create an editorial calendar based on frequently asked questions
    • Address each topic on the editorial calendar honestly and completely in the content format that best suits
    • Post to the blog or create a landing page based on the type of content

    1.Generate a brainstorm

    Brainstorming is one of the best techniques to generate content focused on the needs of your customers.

    For this, you must bring together the different work teams (at least those responsible) and ask them, based on the questions they receive from customers and prospects, to put on the table the topics that can best work on your new site or that yes or yes they should be treated in it.

    Remember that for this technique to be effective, you do not have to judge the ideas that come up. Write them all down and when the activity is over, you can start discarding.

    No contribution should be rejected at the beginning; evaluate and analyze all of them even if, at first glance, they do not seem good.

    Also, consider that for a brainstorm to run correctly you must have:

    • Moderator
    • Duration set time
    • Limited number of participants
    • Concrete objective

    2.Create an editorial calendar

    A functional content strategy for any website and brand requires organization and time, so it is very important that you create an editorial calendar in which you consider the frequently asked questions of your users, prospects and clients.

    Using editorial calendars helps to be more creative when producing content. Having a list of topics to write about, based on frequently asked questions, will allow you to free your mind a bit and boost your imagination to delve into topics and break them down into various pieces.

    Your new website has to answer the most common questions of your users and having that content always available will help boost your business and generate more customers.

    For this reason, it is essential that, regardless of whether it is monthly, quarterly or semi-annually, you have a base for the creation of materials. You can make changes if you consider it pertinent, so do not worry or close yourself off from the possibilities.

    The important thing is that they are always thought of your target audience (not your company) and that you organize yourself well together with the teams so that the content is constant and useful.

    3.Approach your content honestly

    Many times, companies believe that they can “cheat” users and create content focused on extolling their products and speaking wonders about them, but… does it really work? NO!

    It also does not  work to create materials based on their questions, but trying to take advantage of it to attract them in unethical ways. This is a serious error.

    What would it serve you to attract many people with content with half-truths? No problem! You will only generate traffic, but that traffic will not be of quality and, therefore, there will be no possibility of obtaining profits or clients.

    The reality is that people connect more with honest content and, furthermore, it is this type of material that allows you to reach the right audience, that is, the one that can become a customer.

    You do not need to embellish your posts, videos or ebooks; keep it simple. You just need to know what your audience needs and know how to give it to them. Therefore, it is important to identify through what type of format you will make each content known.

    There are many options:

    • Landing page
    • Blog post
    • Videos
    • Infographics
    • Webinars
      Among others

    You can check more options in: Types of content for blog (Spanish) 

    4.Post to the blog or create a landing page

    Depending on the type of content you generate, you have to decide whether to publish it directly on your blog or build a landing page, or landing page, with that information to achieve conversions.

    Both formats are essential within a website. Keep that in mind.

    While a blog post can help you learn more about how your products can help them achieve their goals or make their lives easier, landing pages allow you to convert readers into leads and, later, customers.

    To make it easier, you have to make it simple. Give them a clear and concrete task. Whether you want them to download an eBook or just want to get their email, they need to know exactly where to click and why. So opt for clear and visually appealing text.

    Conclusion

    You now have all the key actions and steps broken down in an easy way so you can build or rebuild your website on the HubSpot CMS and Media Source themes.

    As you have seen, the process is really simple if you put your mind to it and take each of the phases seriously, so drop any pretext and start giving your company the push it needs!

    If you have doubts or questions about any part of the process, contact us and schedule an appointment. At Media Source, we are HubSpot partners and we can help you during any phase of the process.