


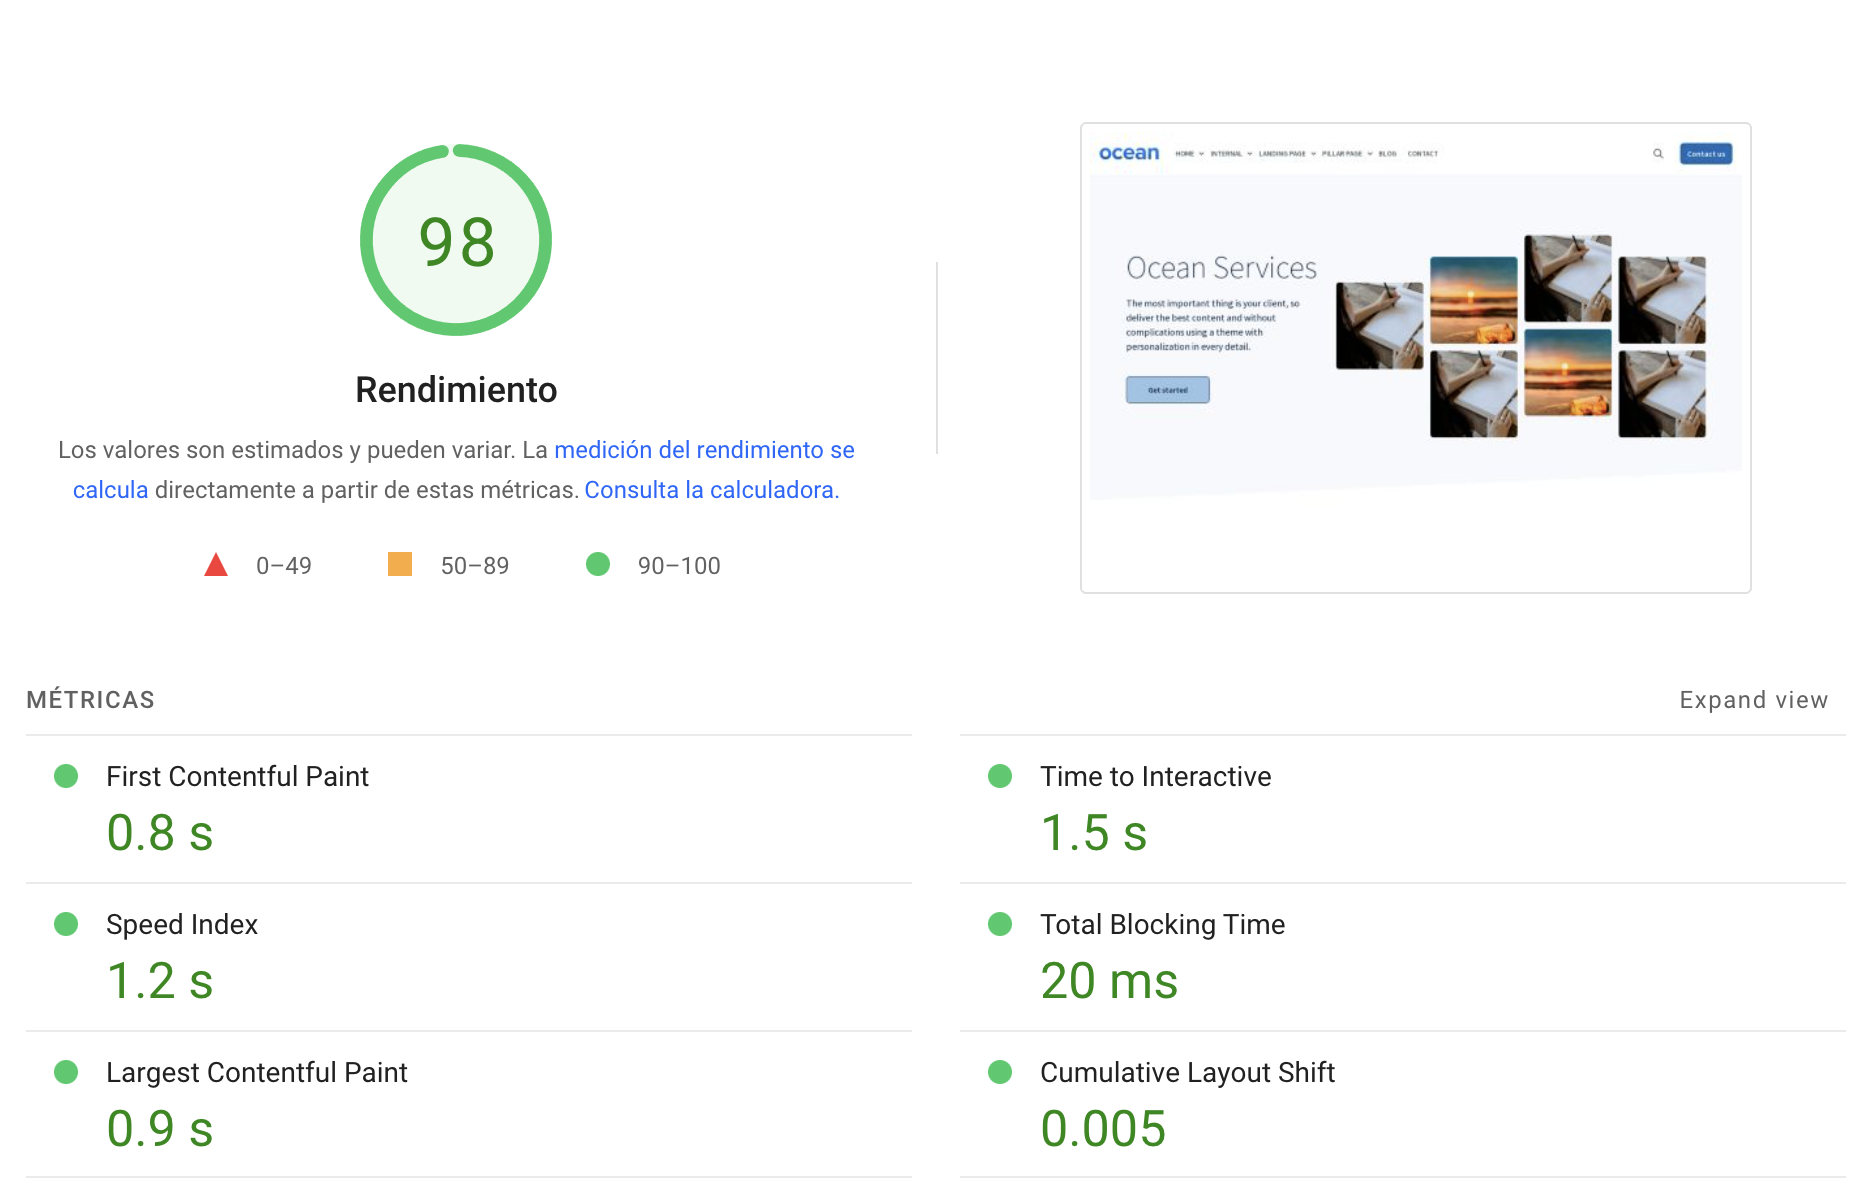
.png?width=319&height=267&name=gtmetrix_2023%20(1).png)
About blog templates included in Ocean Pro Theme
Ocean Pro has two blog templates, one for the listing and one for the posts.
In the case of the listing you can create unique listings using the drag and drop builder of the page editor.
For blog posts Ocean Pro has 7 styles along with more customization by adding or removing certain elements.
Let's see how to configure blog templates.
Choose the templates for the list and the blog post.
Important: The blog post template must be selected when the global header and footer are configured, as changing them will take effect immediately.
Choosing the Ocean templates on the Blog
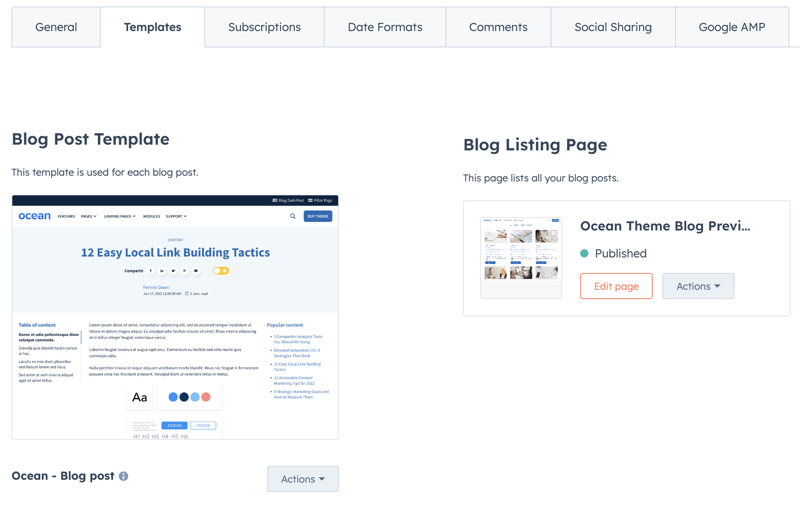
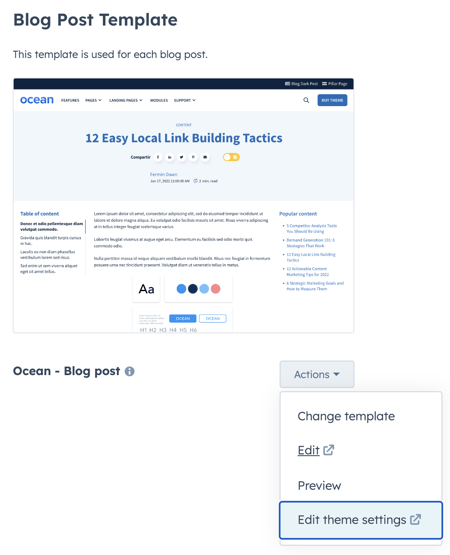
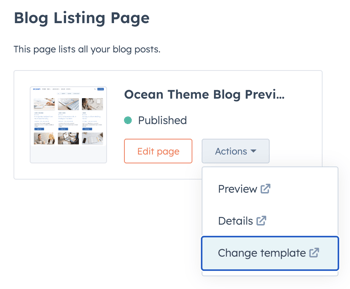
Step 1: Access the blog settings by clicking here
There is a template for the blog post and another for the list.
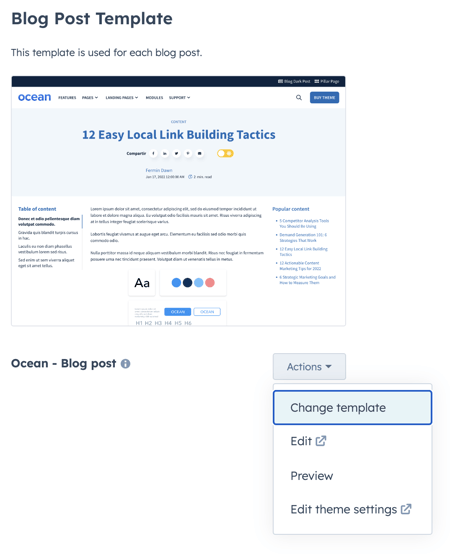
Step 2: Select template click on Actions and then on Change Theme:
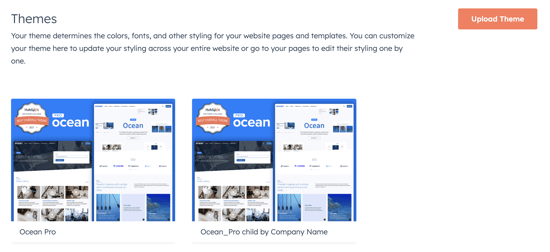
Step 3: Choose the child theme you created from Ocean Pro.
Blog post template
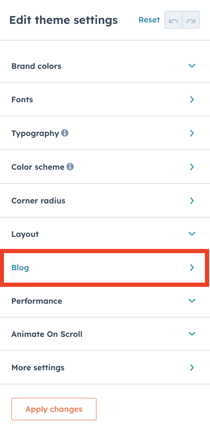
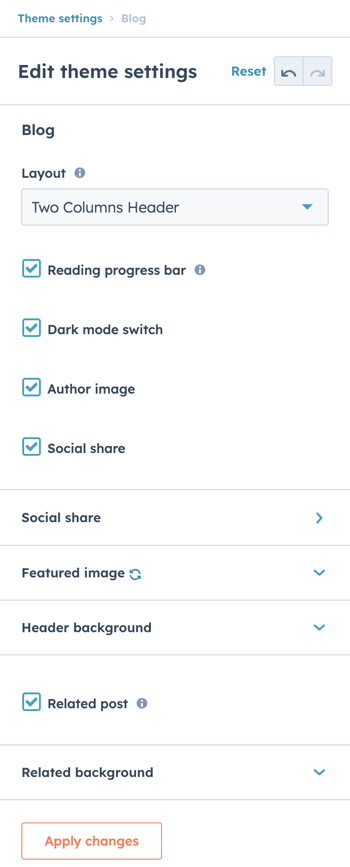
To adjust the style and other details click on Edit theme settings.
Access the list of Themes and Ocean Pro: View theme.
Click on the Blog options
Change View on: Ocean - Blog Post
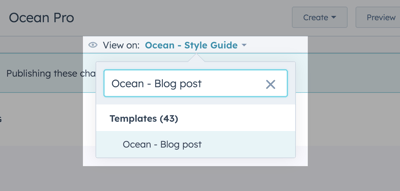
Select any style for blog posts from the 7 different styles
Blog listing page
Ocean Pro blog listing template was created with the new drag drop version, so consider the following:
If you previously had a blog, it may be necessary to activate the new experience.
You can access your listing page with drag and drop: Blog listing.
To adjust the blog list, choose the blog post, if it already exists you must change it from the page.
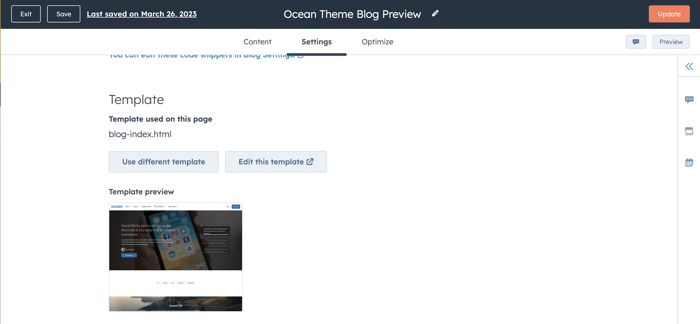
On the listing page in Settings, scroll to the Template part. Click on Use different template, choose the child theme that you have created and the list.
In the case of the list there is a custom module Blog listing.
You can change the style and hide elements that you prefer not to show.
Remember that you can reduce the width from the section, or place a background color.
Apply the best arrangement and styling using the options in the Styles tab.
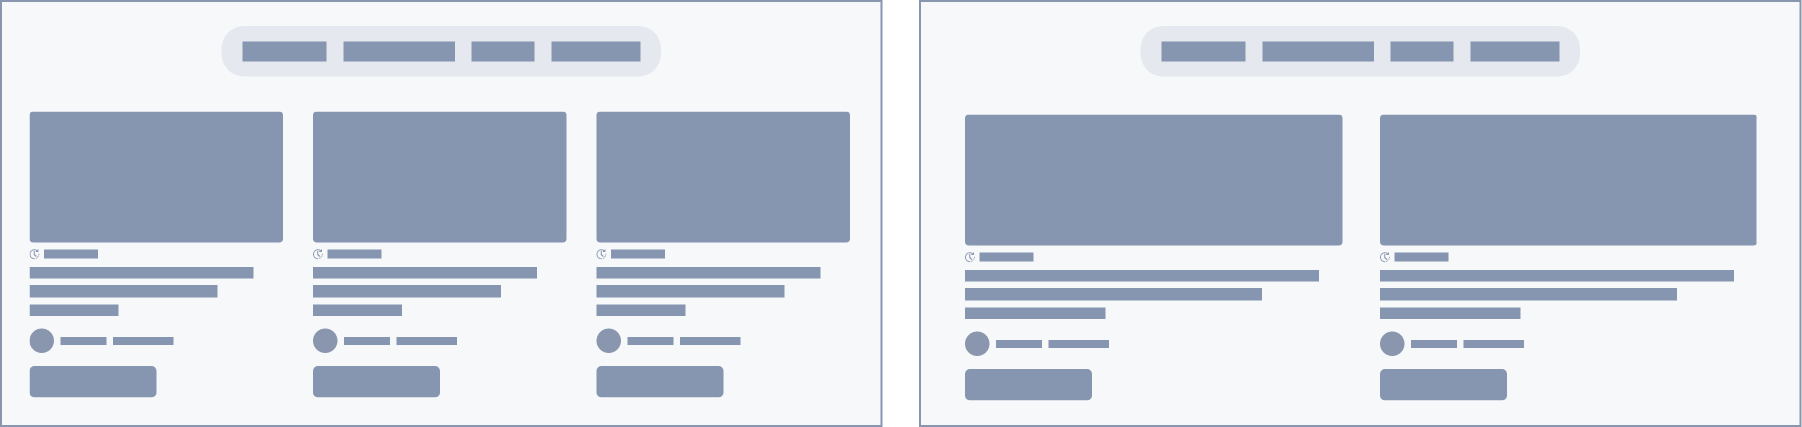
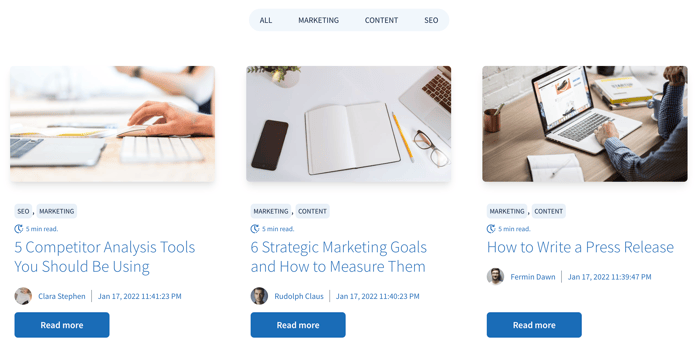
Layout: Cards, 3 columns
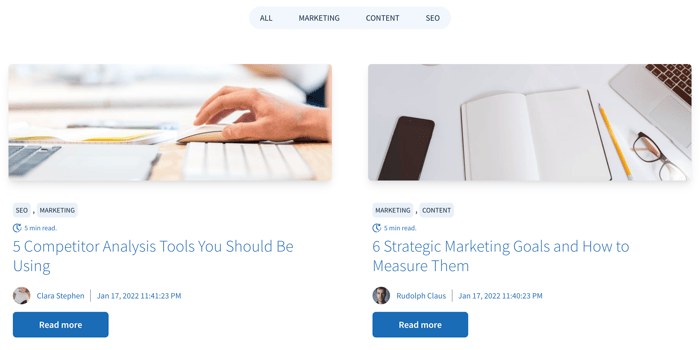
Layout: Cards, 2 columns
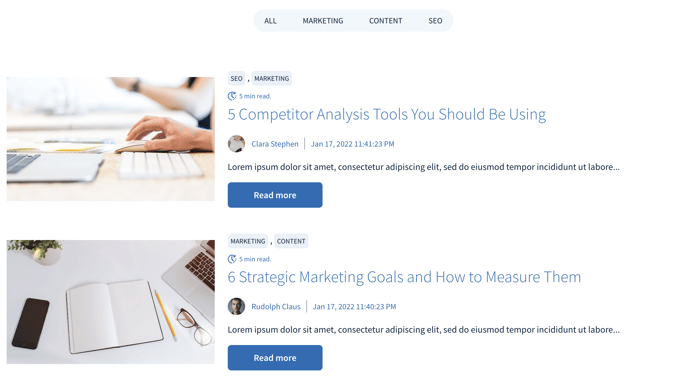
Layout: List
Just remember that the template for posts should only be changed when everything is ready, the list template can be edited and previewed without clicking the publish button until everything is ready to go live.
Excellent work.